
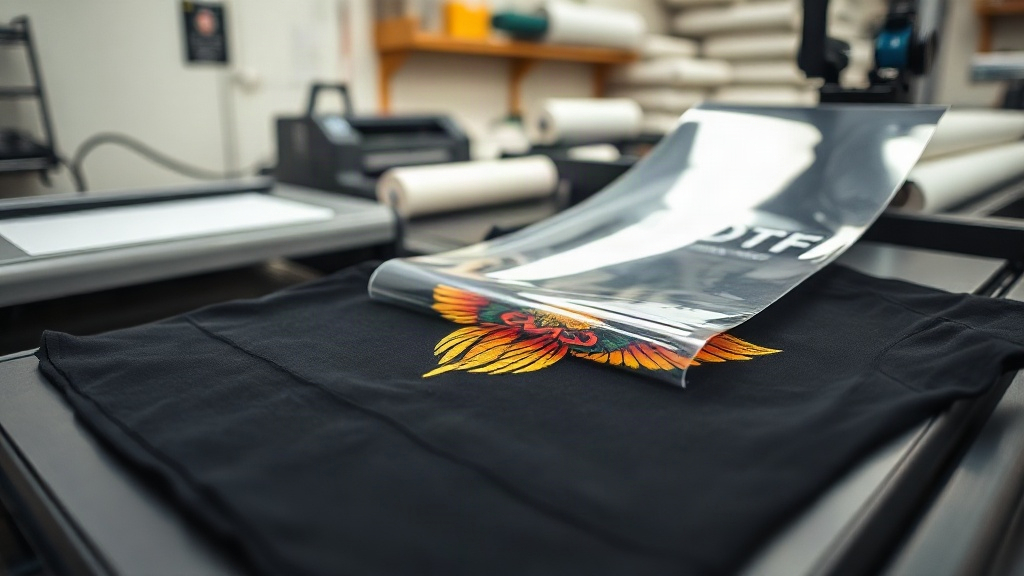
If you've been exploring custom apparel printing, you've likely encountered DTF Transfers. This innovative technology is changing how professionals and hobbyists approach fabric decoration. Unlike traditional methods that require specific fabrics or extensive setup, DTF transfers offer a versatile, cost-effective solution for bringing designs to life on almost any material. In this guide, I'll walk you through the entire process, share insights from my own experience, and help you avoid common pitfalls so you can achieve professional-looking results from day one.
What Are DTF Transfers?
DTF stands for Direct to Film. It's a printing technique where your design is printed onto a special PET film using water-based pigments, then coated with a hot-melt adhesive powder. Once the powder is cured, the transfer is ready to be applied to fabric using a heat press. The magic of DTF Transfers lies in their ability to bond with a wide range of materials, including cotton, polyester, blends, and even synthetic fabrics like nylon. This flexibility makes them a favorite for small business owners, crafters, and anyone looking to create custom t-shirts, tote bags, or promotional items without investing in multiple printing systems.
Why Choose DTF Transfers Over Other Methods?
When I first started printing, I experimented with vinyl, screen printing, and sublimation. Each has its place, but DTF transfers quickly became my go-to for several reasons. First, there's no need to pre-treat shirts or worry about color limitations. Unlike sublimation, which only works on light-colored polyester, DTF transfers adhere beautifully to dark and light fabrics alike. Second, the color vibrancy is outstanding. The pigments sit on top of the fabric, so whites stay bright and details remain sharp, even after multiple washes. Finally, the process is incredibly efficient. You can print multiple designs in one go, store the transfers for months, and press them on demand. This on-demand capability reduces waste and allows you to offer a wider variety of products without holding massive inventory.
Cost-Effectiveness for Small Businesses
Let's talk numbers. Setting up a screen printing shop can cost thousands of dollars, and each color in a design adds to the setup time and expense. With DTF Transfers, your main costs are the printer, ink, film, and powder. Once you have those, the per-print cost is remarkably low, especially for small batches. I've calculated that a full-color A4 transfer costs me under $2 in materials, which means I can offer competitive pricing and still maintain healthy margins. Plus, there's no minimum order quantity, so you can take on one-off custom requests without losing money.
How to Apply DTF Transfers: Step-by-Step
Applying a DTF transfer is straightforward, but attention to detail makes all the difference. Here's my tried-and-true method:
- Preheat your heat press. Set the temperature to 325°F (160°C) for cotton or 300°F (150°C) for polyester. Always check the transfer supplier's recommendations.
- Pre-press the garment. This removes moisture and wrinkles, ensuring a smooth surface. I usually press for 5-10 seconds.
- Position the transfer. Place the film with the design facing up on the garment. If you're using a transfer with a carrier sheet, make sure the adhesive side is down.
- Press. Apply medium to firm pressure for 15-20 seconds. For larger areas, you might need 25 seconds.
- Peel. Wait for the transfer to cool completely before peeling off the film. This is crucial for a clean finish. If you peel while hot, the design may stretch or leave residue.
- Post-press (optional). For extra durability, cover the design with a Teflon sheet or parchment paper and press for another 5-10 seconds.
I learned the hard way that skipping the cooling step can ruin an otherwise perfect print. Patience here pays off.
Common Mistakes to Avoid
Even with experience, it's easy to slip up. Here are a few pitfalls I've encountered and how to steer clear of them:
- Insufficient pressure: If the transfer doesn't adhere evenly, increase pressure. You want the press to feel snug but not overly tight.
- Wrong temperature: Too hot and the film may curl or the adhesive may scorch; too cool and the design won't bond. Invest in an infrared thermometer to verify your press's actual temperature.
- Peeling too soon: As mentioned, always wait for the transfer to cool. This allows the adhesive to set properly.
- Neglecting fabric type: While DTF works on many fabrics, stretchy materials like spandex require a lower temperature and a gentle stretch test after pressing.
Design Considerations for DTF Transfers
Not all designs are created equal when it comes to DTF. To get the best results, keep these tips in mind:
- Use high-resolution images: 300 DPI is the standard. Low-res graphics may look pixelated after printing.
- Add a white underbase: If your design has light colors on a dark garment, the printer software will automatically add a white layer. This ensures opacity.
- Avoid very fine details: While DTF can handle intricate designs, extremely thin lines (less than 0.5pt) may not hold up well. Simplify where possible.
- Consider the final size: Test print at actual size to check readability and impact.
I often create a mockup in Photoshop before printing to visualize how the design will look on different shirt colors. It saves time and materials.
Durability and Washability
One of the top questions I get is, "How long will DTF transfers last?" With proper application, a DTF print can outlast the garment itself. I've worn shirts with DTF prints for over two years, washing them inside out in cold water and tumble drying on low, and the designs still look great. To maximize longevity, avoid bleach, fabric softener, and ironing directly on the print. Following these care instructions will keep your prints vibrant and crack-free.
Frequently Asked Questions About DTF Transfers
Can I use DTF transfers on 100% polyester?
Yes, DTF transfers work well on polyester. However, because polyester is heat-sensitive, use a lower temperature (around 300°F/150°C) and a shorter press time (10-15 seconds) to prevent scorching or dye migration. Always test on a scrap piece first.
Do I need a special printer for DTF transfers?
You can convert an existing inkjet printer to use DTF inks, but it's not recommended unless you're experienced with printer modifications. Dedicated DTF printers are available and are designed to handle the unique demands of DTF ink and film. If you're serious about DTF, investing in a dedicated printer will save you headaches.
How should I store unused DTF transfers?
Store them in a cool, dry place away from direct sunlight. Keep them flat or rolled loosely to prevent creasing. I place mine in a sealed plastic bag with a desiccant packet to avoid moisture, which can affect the adhesive powder. Properly stored, transfers can last up to a year.
What's the difference between DTF and DTG?
DTG (Direct to Garment) prints directly onto the fabric, while DTF involves printing onto a film and then transferring. DTF offers better color vibrancy on dark shirts and works on more fabric types, whereas DTG is limited mostly to cotton and requires pre-treatment. DTF also allows you to print and store transfers for later use, offering more flexibility.
Can I layer DTF transfers?
Yes, you can layer DTF transfers, but it's tricky. You'll need to press the first layer for a shorter time (about 5 seconds), peel the film, then apply the second layer and press fully. This technique works best with simple designs and requires practice to avoid misalignment.
DTF transfers have opened up a world of possibilities for my custom apparel projects, and I'm confident they can do the same for you. With the right knowledge and a bit of practice, you'll be producing stunning, durable prints that impress your customers and keep them coming back.