DTF transfers have revolutionized small-batch garment customization by offering vibrant color, a soft hand feel, and a workflow that suits both hobbyists and growing brands. Direct-to-film transfers, commonly shortened to DTF transfers, blend the best elements of screen printing and heat transfer technologies, delivering full-color graphics with flexible application. When applied correctly and cured properly, these prints provide durable, high-quality graphics on fabrics ranging from 100% cotton to polyester blends, and understanding DTF curing temperatures helps ensure consistent results. This introductory guide emphasizes practical steps for DTF application tips, DTF curing times, pre-press prep, and maintaining a clean, repeatable workflow. Follow these best practices to minimize troubleshooting, extend print life, and maximize color fidelity across a variety of fabrics.
This alternative framing uses film-based transfer technology that prints designs onto a transparent sheet, then applies adhesive and heat to bond the image to fabric. Often described as a print-on-film method, it blends digital color with the convenience and durability of heat-applied graphics. Other descriptors in line with Latent Semantic Indexing include adhesive-coated film transfers, printed-film graphics, and heat-press compatible substrates. As with the original technique, paying attention to curing parameters—such as temperatures and times—and testing on representative fabrics helps ensure reliable results.
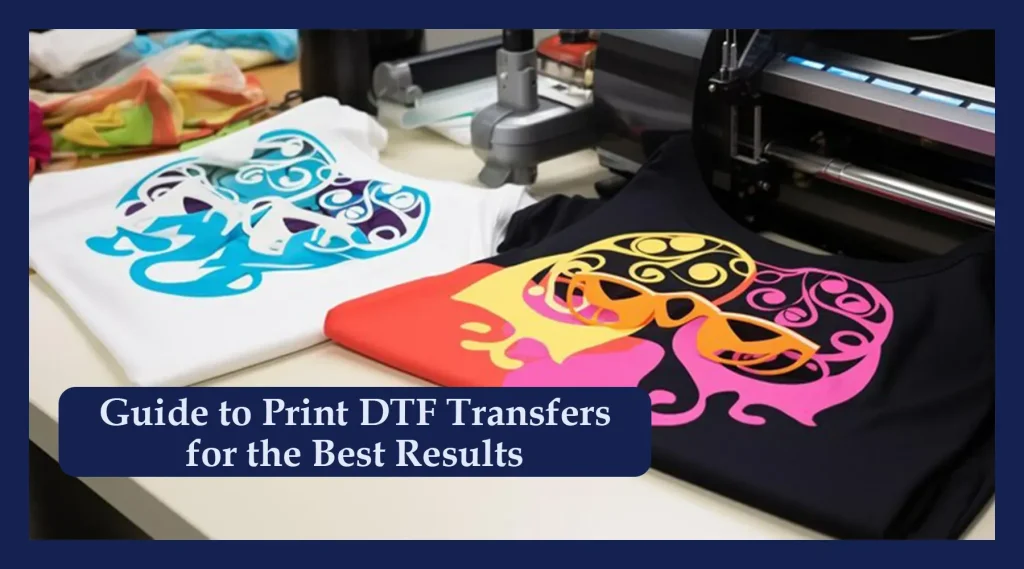
DTF Transfers 101: What They Are and Why They Matter for Small-Batch Garment Customization
DTF transfers, or direct-to-film transfers, involve printing a design onto a transparent film with water-based inks, applying an adhesive powder, and then curing the film before bonding it to fabric. This approach combines elements of both heat transfer and film-based processes, delivering vibrant color and detail while remaining practical for smaller runs. By using a transfer that is created on film, you gain flexibility in storage, shipping, and handling compared to some other printing methods.
Direct-to-film transfers enable full-color designs with fine gradients and soft transitions, making them an attractive choice for hobbyists and growing brands. When applied correctly and cured properly, DTF transfers produce durable graphics on a wide range of fabrics, from 100% cotton to polyester blends. This guide emphasizes best practices for application and curing to minimize troubleshooting and extend print life.
Choosing Fabrics for DTF Transfers: Balancing 100% Cotton, Polyester Blends, and Texture
Choosing the right fabric is the first step to successful DTF transfers. Cotton and cotton blends are typically the most forgiving substrates, offering good adhesion and crisp detail. Polyester-rich blends can also print well, but you’ll want to adjust curing temperatures and times to prevent issues like edge curling or gloss changes in dark fabrics.
Avoid fabrics with fuzzy textures or high nap in areas where you want sharp detail, as they can print unevenly and may require adjustments to pressure and dwell time. Surface preparation matters too: wash and dry garments to remove sizing, use a lint roller if needed, and pre-press briefly to remove moisture and create a smooth pressing surface for consistent results.
Preparation and Film Handling for Reliable DTF Transfers
Following your transfer supplier’s printing guidelines is essential. Inks should be vibrant and fully cured on the film before applying adhesive powder, and the film should be cooled to handling temperature before bonding. Proper film handling helps prevent issues like misregistration and powder clumping, contributing to a more predictable finish.
Aligning and securing the transfer on the garment is critical for professional results. Use a ruler or alignment tool, press on a firm, heat-resistant panel, and consider a pressing pillow or silicone pad to smooth seams and curves. Meticulous handling at this stage supports consistent adhesion and helps minimize post-press adjustments.
Step-by-Step Application Best Practices for Consistent DTF Transfers
Application starts with a quick, consistent pre-press of 2-5 seconds to remove moisture and flatten wrinkles. Then position the transfer face down on the fabric, aligning the design with the garment’s center. Ensure spacing and symmetry if applying multiple designs before pressing.
Seal with heat and pressure using a high-quality heat press. Follow the recommended pressure settings from your equipment and transfer supplier, typically in the medium to firm range, and press for about 10-15 seconds depending on fabric and film type. Peel strategy varies by product: some transfers peel hot, others after a brief cooldown. Always test a sample swatch and follow supplier guidelines to avoid lifting or tearing. After peeling, inspect edges for complete bonding and, if needed, apply a brief touch-up with a silicone sheet. Use a protective heat sheet when necessary to prevent scorching.
DTF Curing Temperatures and Times: How to Achieve Durable, Wash-Fast Prints
Curing is the stage where the adhesive and ink bond with fabric fibers, improving wash durability and color fastness. While guidelines vary by brand and fabric, a common baseline is around 150-160°C (300-320°F) for 10-15 seconds, followed by a brief post-press cooldown and a rest period before handling. Always verify the exact temperature and time with your transfer supplier for the specific film and adhesive you’re using.
After applying, allow the garment to cure in a dust-free environment for at least 24 hours before washing to maximize bond strength. For fabrics that endure heavy wear or frequent washing, consider longer cure windows or multiple tests to identify the optimal parameters. Documenting curing temperatures and times for each substrate helps refine your process as you expand production.
Quality Control, Troubleshooting, and Long-Term Care for DTF Transfers
Even with best practices, issues can arise. Common problems include ghosting or color lag when the garment isn’t flat or the film shifts during pressing; peeling at edges from insufficient bonding or uneven pressure; and cracking in fine details if the fabric stretches during pressing. White residue around edges can indicate excess adhesive powder. Each issue has a practical remedy, such as re-pressing targeted areas, using a silicone sheet, or adjusting powder application.
Maintaining consistency is about documentation and iteration. Record every run—fabric type, transfer model, temperature, time, and pressure—and consider building a “recipe book” for different substrates and films. Regularly review your processes with test batches, especially when introducing new inks, films, or garment fabrics, to sustain high-quality results and scalable production.
Frequently Asked Questions
What are DTF transfers and why choose direct-to-film transfers for small-batch apparel?
DTF transfers (direct-to-film transfers) are created by printing a design onto a transparent film with water-based inks, applying an adhesive powder, and curing. The finished transfer bonds to fabric under heat and pressure, delivering vibrant color, a soft hand feel, and full-color designs with fine details. For small batches, DTF transfers can be more cost-effective than DTG, easier to store and ship than traditional screen printing, and offer a faster setup with lower risk of color misregistration while delivering durable results on fabrics from 100% cotton to polyester blends.
How do I determine DTF curing temperatures for different fabrics and ensure proper bonding?
DTF curing temperatures depend on the brand, ink system, adhesive, and fabric. A practical baseline is typically 150-160°C (300-320°F) for about 10-15 seconds, followed by a brief cooldown. Always verify the specific DTF curing temperatures with your transfer supplier’s recommendations and use a thermometer or heat press readout to monitor temperature for consistent results.
What are typical DTF curing times for common fabrics, and how do I know when to stop the timer?
Typical DTF curing times are in the 10-15 second range, varying with fabric and film type. After pressing, allow a short post-press cooldown as directed and test a swatch to confirm full adhesion before handling. Recording the exact DTF curing times for each substrate helps maintain consistency across runs.
What are essential DTF application tips to achieve a crisp, durable bond?
DTF application tips include pre-pressing the garment for 2-5 seconds to remove moisture, centering the transfer, applying even heat with medium-to-firm pressure, and following the recommended press time. Use the supplier’s peel strategy (hot or cold peel) and inspect edges after peeling. If needed, re-press with a silicone sheet to improve adhesion and protect the surface.
How can I troubleshoot common issues like peeling, ghosting, or cracking with DTF transfers?
Common DTF transfer issues can often be resolved by ensuring the garment lies flat and is properly aligned, verifying printer calibration, and adhering to recommended curing temperatures and times. For peeling at edges, re-press with targeted pressure or a silicone sheet; for ghosting, check alignment and bond; for cracking or fine-detail cracking, avoid stretching the fabric during pressing and use a pressing pillow on curved areas.
What post-press care steps maximize the durability of DTF transfers?
After curing, wait about 24 hours before washing to maximize bond strength. Turn garments inside out, avoid bleach and harsh detergents, and dry on low heat or air-dry to minimize heat exposure after the first few washes. For performance fabrics, test durability across multiple wash cycles and adjust curing parameters as needed while maintaining a consistent workflow.
| Aspect | Key Point | Benefits / Notes |
|---|---|---|
| What are DTF transfers? | Definition and process | DTF transfers are printed designs on a transparent film using water-based inks, with adhesive powder applied and the film cured. The transfer is bonded to fabric with heat and pressure, enabling full-color designs with gradients. They’re often more cost-effective for short runs and easier to store and ship than some alternatives. |
| Why choose DTF? | Advantages vs other methods | DTF offers versatility across fabrics, cost-effectiveness for small runs, easy storage/shipping, and strong color fidelity and durability, often with faster setup than screen printing and lower risk of color misregistration than traditional methods. |
| Materials and setup | Tools and workflow | Key items include a reliable heat press, DTF films, adhesive powder, curing equipment, lint-free prep tools, a clean organized workspace, a thermometer/readout, and compatibility checks with your transfer supplier. |
| Preparation and material selection | Fabric choices and prep steps | Prefer cotton and cotton blends; polyester blends can work with proper curing temps and times. Avoid fuzzy textures in areas needing sharp detail. Pre-wash, lint roll, and pre-press 2-5 seconds for a smooth surface. |
| Printing and film handling | Printing and film handling | Follow supplier guidelines; ensure inks are vibrant and fully cured on the film before applying powder; apply adhesive powder evenly, cure the film, then cool to handling temperature before bonding. |
| Aligning and securing | Positioning and stabilization | Align with a ruler or alignment tool, place the garment on a firm panel, use a pressing pillow or silicone pad to flatten seams and create a flat pressing surface. |
| Application best practices: step-by-step | Step-by-step process | 1) Pre-press for 2-5 seconds; 2) Position the transfer centered; 3) Seal with heat and even pressure per guidelines; 4) Peel strategy depends on product; 5) Post-press inspection and touch-ups; 6) Use a silicone sheet to protect when needed. |
| DTF curing: how and why it matters | Curing basics | Curing time and temperature bond ink and adhesive to fabric. Typical guidelines: 150-160C (300-320F) for 10-15 seconds, then cooldown and a short rest before handling. Always verify settings with the supplier. |
| DTF processing on different fabrics | Fabric considerations by substrate | Fiber composition affects bonding: cotton-rich fabrics often take stronger adhesion with minimal edge curl; polyester blends may need longer dwell times or extra pre-press. Use test swatches and document settings. |
| Quality control and troubleshooting | Common issues and remedies | Ghosting, edge lifting, cracking, white residue, and fading can occur. Remedies include ensuring flat alignment, re-pressing with targeted pressure, using silicone sheets, and adjusting curing times, temperatures, or powder application. |
| Durability and care tips | Care guidelines | Wait 24 hours after curing before washing; turn garments inside out; avoid harsh detergents; dry on low heat or air-dry; test durability on athletic fabrics after multiple washes. |
| Keeping your process consistent | Documentation and optimization | Document every run (fabric type, transfer model, temperature, time, pressure); build a recipe book; maintain test batches when introducing new inks or films; review and adjust the workflow as needed. |
Summary
DTF transfers offer a versatile path to high-quality, durable prints across a wide range of fabrics. By focusing on preparation, precise application, and proper curing, you can reduce rework, improve color fidelity, and increase customer satisfaction. Following manufacturer guidelines, testing with representative swatches, and maintaining a consistent workflow helps scale production from hobby projects to growing brands. With careful fabric selection, surface prep, accurate alignment, controlled heat and pressure, and reliable curing, DTF transfers become a repeatable, scalable method for colorful, long-lasting graphics on clothing.

