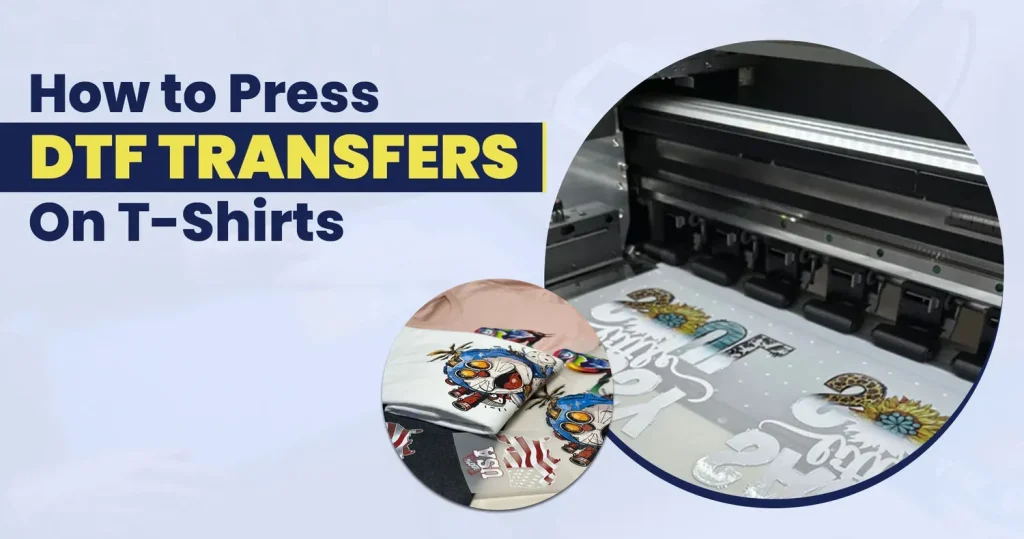
DTF transfers are transforming the world of custom apparel with vibrant, durable designs and a smoother production workflow. At the heart of this technology is Direct-to-Film printing, a process that prints onto a clear carrier film and uses a powder adhesive to bind color to fabrics. To get the best results, designers should pay attention to materials such as the film, inks, and the curing steps that set the adhesive without cracking, including considerations for substrate variance, ink compatibility, and storage conditions. A well-tuned setup supports easy color management, consistent registration, and reliable washes, making DTF transfers a practical choice for small runs and batches. If you’re weighing DTF vs DTG, this guide explains the trade-offs for fabrics, colors, and production volumes to help you pick the right method, and it also covers common misconceptions and practical production tips that save time and reduce waste, helping you scale with confidence.
Another way to frame this technology is as a film-based garment decoration method, where artwork is printed onto a carrier sheet and backed with an adhesive to bond to fabric. In SEO terms, you’ll encounter phrases like print-on-film transfer, adhesive-coated film method, and digital-to-fabric printing as synonyms that describe the same process used for apparel graphics. Recognizing these terms helps designers navigate tutorials, suppliers, and heat-press parameters without getting hung up on one brand name.
Understanding Direct-to-Film Printing and DTF Transfers
Direct-to-Film printing, or DTF transfers, refers to a process where the design is printed onto a transparent PET film using water-based inks, dusted with adhesive powder, and cured before being pressed onto a garment. This workflow, often marketed as Direct-to-Film printing, results in a vivid image with strong color reproduction and a flexible hand on various fabrics. The DTF film acts as a carrier, and the white underbase is typically built into the print to ensure opacity on dark fabrics.
Compared with traditional DTG and screen printing, DTF transfers offer versatility, easier color changes, and efficient setup for multi-color designs. The transition from printing to curing enables faster production for small runs while maintaining durability on cotton, poly blends, and dark garments. When evaluating DTF transfers, consider how this method stacks up against DTG, noting how white underbase and film-based adhesion influence texture and longevity.
DTF Film Quality and Material Choices That Impact Vivid Color
DTF film quality matters: high-grade film reduces ghosting, maintains sharp edges, and feeds cleanly through the printer. The film works in tandem with compatible white ink underbase and color inks to reproduce vibrant designs. Choosing a film that pairs with your printer and inks minimizes misregistration and curling during transfer.
Material choices extend beyond film to adhesive powder and curing equipment. Uniform powder application and proper curing temperatures ensure strong adhesion to fabrics without leaving a crunchy texture. Handling and storage of DTF film also affect results, as humidity and temperature fluctuations can impact film stiffness and feed reliability.
Heat Press for DTF: Achieving Consistent Results with Temperature, Time, and Pressure
Achieving consistent results with a heat press for DTF requires dialing in temperature, time, and pressure. Typical guidelines often place the process in the 320-360°F (160-180°C) range for 12-20 seconds, but always follow your film manufacturer’s recommendations. The heat press for DTF should maintain even contact across the platen to prevent hot spots that could distort image edges.
Pre-press practices, such as removing moisture and flattening fibers, ensure the transfer sits flat during the application. Align and tape the film properly, and select a pressure that yields a firm bond without crushing the design. After pressing, allow the garment to cool and perform any required post-press curing to solidify the adhesive bond.
DTF vs DTG: When Direct-to-Film Printing Is the Better Choice
DTF vs DTG is a common consideration when planning production. Direct-to-Film printing supports a broader range of fabrics and darker colors because of the white underbase, and it tends to offer shorter setup times for multi-color designs. In contrast, DTG shines on light fabrics with very fine detail, but may require more maintenance and a dedicated garment printer.
Choosing between DTF transfers and DTG depends on factors such as fabric mix, order size, and desired hand feel. For small runs and diverse fabrics, DTF transfers can deliver reliable color fidelity with a robust adhesive bond. Compare total cost of ownership, including ink, film, and maintenance, to decide which method best fits your shop.
Color Management, Underbase Techniques, and File Preparation for DTF Transfers
Color management for DTF transfers starts with accurate file preparation and color separations, especially for white underbase on dark fabrics. Calibrate monitors and printers to predict how reds, greens, and yellows will reproduce after the heat press. The terms Direct-to-Film printing and DTF film are often used interchangeably in planning, but the focus remains on achieving opacity, brightness, and color fidelity.
File preparation best practices include using vector sources when possible, testing with a similar fabric, and performing proof prints to compare on actual garments. Consider how the white underbase interacts with pigment inks, and adjust ink density to prevent color bleeding while maintaining sharp edges on dark textiles.
Troubleshooting, Durability, and Best Practices for Long-Lasting DTF Transfers
Troubleshooting common issues with DTF transfers helps maintain consistency across batches. Problems such as poor adhesion, white underbase gaps, or color shifts can stem from uneven powder curing, incorrect temperatures, or insufficient press time. Use systematic checks to isolate the cause, whether it’s film mismatch or press calibration.
Best practices for durability include proper garment handling, washing guidelines, and avoiding high heat on the dryer. Document your process for each design, including film type, heat press settings, and curing steps, so subsequent runs reproduce the same strong results. Regular maintenance of the heat press and printer ensures long-lasting DTF transfers.
Frequently Asked Questions
What are DTF transfers and how does Direct-to-Film printing work?
DTF transfers are designs printed onto a DTF film using Direct-to-Film printing. A white underbase is typically printed for opacity on dark fabrics, then adhesive powder is dusted onto the wet ink and cured. The transfer is applied with a heat press, where the adhesive bonds the ink to the fabric for a durable, flexible result. This approach sits between DTG and screen printing in workflow and versatility.
What role does DTF film play in Direct-to-Film printing and how do you choose quality DTF film for DTF transfers?
DTF film serves as the carrier for the printed design in Direct-to-Film printing. It must feed smoothly through the printer and work with compatible inks and powders to form a strong bond on fabric. Choosing a reliable DTF film—matched to your printer, ink set, and white underbase—helps prevent curling, misregistration, and color loss, improving overall DTF transfers quality.
How do you correctly use a heat press for DTF transfers to ensure strong adhesion and durability?
Using a heat press for DTF transfers requires proper pre-press, appropriate temperature, time, and pressure for your film and fabric, plus careful post-press curing. Typical ranges are around 320-360°F (160-180°C) for 12-20 seconds, followed by a controlled peel. Consistent heat and even pressure across the transfer yield durable, vibrant results.
DTF vs DTG: which method delivers better color and durability across fabrics?
DTF vs DTG highlights different strengths. DTF transfers provide strong color and opacity on a wide range of fabrics, including dark garments, thanks to the white underbase and robust adhesion, with generally simpler multi-color workflows. DTG can achieve ultra-fine detail on light fabrics, but may require more specialized equipment and care for darker textiles. Your choice depends on fabric type, run size, color fidelity, and budget.
What are common troubleshooting tips for DTF transfers when adhesion or color isn’t right?
Common issues include poor adhesion, white underbase problems, color dullness, and edge peeling. Fixes include ensuring proper powder curing, accurate pre-press, correct temperature, time, and pressure, plus solid color management and screening. Always run small test prints on similar fabrics to dial in settings before production runs.
What materials and best practices help ensure consistent DTF transfers for multiple shirts?
Key materials include high-quality DTF film, compatible inks, a reliable white underbase, and uniform adhesive powder. Establish a repeatable workflow with documented temperatures, times, pressures, and film types, perform thorough pre-press, and test before each batch to maintain consistent, high-quality DTF transfers.
| Aspect | Key Points |
|---|---|
| What are DTF transfers? | Printed designs on PET film with a white underbase, followed by adhesive powder, cured and heat-pressed onto fabric to produce vivid, durable prints across a range of fabrics (including dark garments). |
| Key components | DTF film (carrier), white underbase ink, color inks, adhesive powder, and a reliable heat press. The film carries the print; powder bonds ink to fabric; heat cures and activates adhesion. |
| Direct-to-Film vs DTG / screen printing | DTF sits between DTG and screen printing: often faster for small runs, easier color changes, less setup, and works well on dark fabrics due to the white underbase. Screen printing can be cheaper for long runs; DTG offers ultra-fine detail on light fabrics. |
| Materials & consumables | Quality DTF film compatible with your printer and inks, white underbase ink, color inks, uniformly dusted adhesive powder, and a well-tuned heat press for consistent curing and adhesion. |
| Design preparation | Start with vector or high-res raster art (>=300 dpi). Account for white underbase on dark fabrics, plan color separations, and test print on similar fabric to gauge color shifts. |
| Step-by-step application (summary) | 1) Design/print with white underbase; 2) Dust adhesive powder; 3) Cure powder; 4) Pre-press garment; 5) Align and tape; 6) Press at recommended temperature/time/pressure; 7) Peel and finish; 8) Optional post-press cure. |
| Troubleshooting | Poor adhesion: check powder curing, temperature, time, and pressure. White underbase issues on dark fabrics: verify underbase and proper color layering. Cracking/peeling after washing: follow washing guidelines and ensure complete cure. Color bleed/dull colors: revisit color management and underbase density. |
| Durability & care | DTF transfers are durable with proper curing. Wash inside-out in cold or warm water, use gentle cycles, avoid high-heat drying, and avoid ironing directly on the print. Pre-press and post-press care are important for longevity. |
| Best practices | Test every batch on similar fabrics; pre-press consistently; mirror printing when needed; use overlays or masking for complex designs; document temperatures, times, pressures, and film types to reproduce results. |
| Future trends | New film formulations, more color-stable inks, smarter curing methods, improved film transparency, and streamlined workflows that integrate design software with printer and heat-press settings for easier adoption by small studios and hobbyists. |
Summary
HTML table above summarizes the key points about DTF transfers for T-shirts.

