This guide introduces UV DTF gang sheet best practices for maximizing quality and throughput on apparel and other substrates. By aligning prepress layout, ink management, and curing strategies, teams can improve UV DTF printing quality control while boosting overall output. It covers how to plan layouts, calibrate equipment, and streamline workflows so every gang sheet delivers consistent, repeatable results. Adopting UV DTF workflow automation and robust color management helps reduce setup time and material waste without compromising color fidelity. Key related topics include DTF print throughput optimization, gang sheet production UV DTF, DTF curing and finishing tips, and practical QC checks that sustain quality across batches.
Viewed through an LSI lens, the topic can be described as ultraviolet-curable ink transfers on film and the optimization of multi-design sheets for higher productivity. Alternative terms such as ultraviolet-curable direct-to-film printing, sheet nesting, and print throughput optimization capture the same concepts without repeating the exact headline. Focusing on color consistency, registration accuracy, proper curing, and workflow automation aligns with practical goals for shops aiming to scale output.
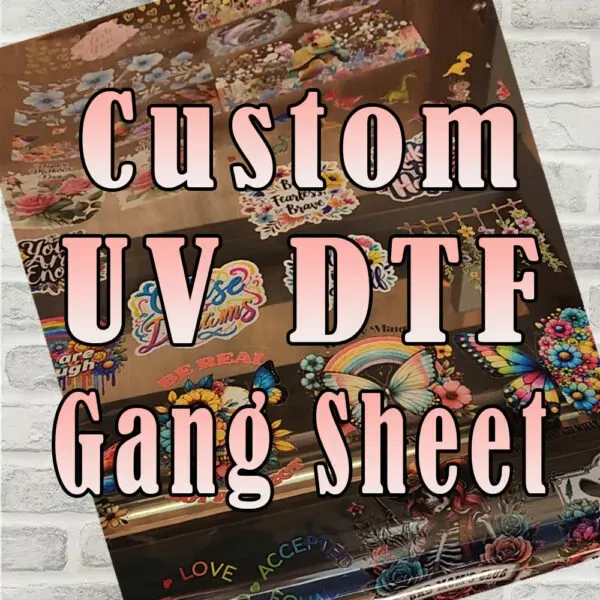
1) Understanding UV DTF and gang sheets for quality and throughput
UV DTF (Ultraviolet Direct-to-Film) enables vibrant, durable designs by depositing UV-curable inks onto a PET film that is later heat-transferred to textiles or other substrates. The result is rapid drying, strong color saturation, and reliable wash durability. This foundational understanding helps shops predict how each design will perform during transfer and how substrate compatibility, adhesive behavior, and pre-treatment impact final appearance.
When you combine UV DTF with gang sheets—placing multiple designs on one large transfer sheet—you dramatically boost throughput while maintaining or improving print quality. This approach aligns with the goal of DTF print throughput optimization: maximizing the number of designs per run without compromising color accuracy or edge integrity. With careful planning, gang sheets can shorten setup times and reduce material waste, accelerating delivery to customers.
2) UV DTF printing quality control essentials
Quality control starts before printing with color management,ICC profiling, and soft-proofing to anticipate how colors will translate from screen to substrate. In practice, UV DTF printing quality control relies on calibrated monitors, standardized reference colors, and documented color targets to prevent drift across batches.
Inline checks during printing—such as nozzle health, registration verification, and color consistency—help catch issues early. Regular color verification with a spectrophotometer or colorimeter, paired with traceable batch records, ensures each gang sheet maintains the expected appearance from start to finish and supports reliable post-transfer results.
3) Gang sheet production UV DTF: layout, nesting, and substrate strategy
Effective gang sheet production UV DTF begins with meticulous layout planning. Map the number of designs per sheet, their sizes, margins, and bleed, so that every inch of space is used efficiently while preserving critical margins for clean separations after transfer.
Nesting strategies—whether using dedicated software or printer capabilities—maximize density while preserving accurate registration. Prioritize high-contrast designs and place elements away from edges to minimize crop risk. A well-planned print order also reduces color drift by grouping similar color profiles and minimizing ink loading changes between jobs.
4) UV DTF gang sheet best practices: layout, registration, and throughput
UV DTF gang sheet best practices emphasize disciplined prepress preparation, precise alignment marks, and consistent bleed margins to ensure accurate separation during finishing. Plan layouts that minimize white edges and maximize edge-to-edge color consistency, while maintaining reliable cut paths for post-cut processing.
During printing and finishing, close attention to registration accuracy and edge alignment is essential to minimize mis-registration after separation. Implement standardized prepress templates and automated QA checkpoints to sustain throughput without sacrificing color fidelity or edge sharpness across designs on every gang sheet.
5) DTF curing and finishing tips
DTF curing and finishing tips focus on achieving a full, durable cure without embrittlement. Calibrate UV lamp exposure times to substrate-specific testing, and monitor lamp intensity and aging to prevent under- or over-curing that can affect adhesion and color stability.
Post-transfer finishing also matters: allow transfers to cool in a clean area, align press settings for any additional coatings, and perform wash testing to confirm durability. Proper curing and finishing guard against edge lifting, color shift, and compromised wash performance, delivering consistent results across batches.
6) UV DTF workflow automation and continuous improvement
UV DTF workflow automation ties together file prep, color management, job tickets, and QA data into a seamless process. A centralized system captures design data, substrate type, color targets, and curing results for every gang sheet run, supporting traceability and repeatability across production.
KPI-driven continuous improvement—covering defect rate, color accuracy, and sheets per hour—drives ongoing enhancements. By adopting data-driven adjustments, PDCA cycles, and Kaizen-style refinements, shops can reduce setup times, improve throughput, and sustain high-quality outcomes across all gang sheet runs.
Frequently Asked Questions
What are the core UV DTF gang sheet best practices for layout planning and color management?
Start with a plan that specifies the number of designs per gang sheet, their sizes, and the target color palette. Use consistent margins and bleed to prevent white edges and to simplify separations. Practice color management with calibrated monitors and ICC profiles for the substrate, plus soft-proofing to predict color translation. Prefer vector artwork for sharp borders, and ensure RIP settings support multi-design gang sheets with stable ink coverage. A well-planned layout minimizes waste and improves consistency across runs.
How can I ensure UV DTF printing quality control on gang sheets during production?
Implement inline quality checks during printing, including visual inspection for color consistency, registration, and edge bleed. Use color verification with a spectrophotometer or colorimeter when possible against ICC targets. Check alignment marks and ensure consistent head heights; run nozzle checks and maintain a log of batch/substrate data to detect drift. Calibrate colors after maintenance and substrate changes to maintain QC standards.
What strategies drive DTF print throughput optimization when using UV DTF gang sheets?
To improve throughput, maximize sheet density with nesting to fit as many designs as possible without compromising accuracy. Use batch processing and reusable prepress templates to reduce setup time. Plan print order to minimize color drift and ink loading changes. Track sheets per hour and defect rate to optimize the balance between throughput and quality.
What should I consider for gang sheet production UV DTF to maintain consistent results across runs?
Verify substrate compatibility and adhesive behavior across fabrics. Apply pre-treatment consistently when needed, and use efficient nesting strategies to minimize wasted space. Plan print order to reduce color shifts and ensure design separation from edges. Maintain substrate batch consistency and document adhesive performance for each run.
What are DTF curing and finishing tips to prevent issues after transfer in UV DTF gang sheet workflows?
Calibrate curing times to fully cure inks without embrittlement; monitor lamp intensity and replace aging lamps. Control substrate temperature during curing to avoid adhesion issues. Allow transfers to cool, handle with care, and perform wash tests to validate durability after finishing.
How can UV DTF workflow automation improve gang sheet production and QA?
Leverage UV DTF workflow automation to link job tickets, color targets, and substrate data across prepress, print, and QC. Use a centralized system for traceability and automatic color management integration with the RIP. Capture QC and curing results to drive data‑driven adjustments and improve UV DTF gang sheet best practices over time. Monitor KPIs like sheets per hour, defect rate, and uptime to pursue continuous improvement.
| Topic | Key Points |
|---|---|
| Introduction | UV DTF is a flexible, cost-effective method for vibrant, durable designs on apparel and substrates. When combined with gang sheets, multiple designs fit on one transfer sheet to boost throughput while preserving or improving print quality. This article covers best practices to optimize quality control (QC) and throughput, including layout planning, equipment calibration, ink management, and workflow streamlining. |
| What is UV DTF? | UV DTF (Ultraviolet Direct-to-Film) deposits UV-curable inks on PET film, which are heat-transferred to textiles/substrates using adhesive and heat. UV-curing enables rapid drying, high color saturation, and good wash durability. In production, UV DTF supports both short and long batches with consistent color and sharp detail. |
| What is a gang sheet? | A gang sheet is a single large sheet holding multiple designs. For UV DTF, it maximizes output per print run by packing designs onto one sheet and separating them during finishing. Benefits include reduced material waste, shorter setup per design, and improved throughput, provided layouts are optimized and quality control is carefully managed. |
| Quality control & throughput focus | QC ensures color accuracy, registration, and durability across all designs on a gang sheet. Throughput optimization focuses on completing a run quickly without sacrificing quality. Together, these goals help shops scale production, reduce defects, and shorten delivery time. |
| Prepress: Layout planning & artwork prep | – Start with a plan: determine how many designs per gang sheet, their sizes, and the color palette to minimize waste. – Consistent margins and bleed: uniform margins and bleed prevent white edges and ensure clean separations. – Color management: calibrated monitors, ICC profiles for substrate, soft-proofing, and a reference sheet for critical colors. – Raster vs. vector: vectors ensure sharp edges; high-res raster (300 dpi+) prevents pixelation; vectors help with cut paths. – RIP settings: use a RIP that supports multi-design gang sheets, verified color profiles, standardized resolution, and check for banding. |
| Prepress: Substrate & adhesive considerations | – Substrate compatibility: ensure fabric/substrate is compatible with UV DTF inks and adhesive; some fabrics may need pre-treatment or post-curing adjustments. – Adhesive behavior: understand adhesive performance across fabrics; high-stretch or textured fabrics may require adjusted settings to minimize cracking/peeling. – Pre-treatment: can improve ink adhesion and color vibrancy; apply consistently and test on swatches. |
| Prepress: Color separation & nesting strategies | – Segmented color management: separate color channels for complex designs; ensure white channel aligns with substrate expectations. – Nesting efficiency: use nesting software or printer capabilities to optimize placement; prioritize high-contrast designs and keep critical elements away from edges. – Print order planning: group similar color profiles to minimize drifts; avoid abrupt changes in ink loading between jobs. |
| Printing & calibration: starting the run | – Printer calibration & maintenance: perform regular head/nozzle checks; run automated nozzle checks and fix issues before starting. – Color consistency: recalibrate after maintenance or substrate changes; maintain color targets. – Ink management: use fresh, properly stored inks; monitor viscosity and surface tension for uniform deposition. |
| Print parameters for reliable gang sheets | – Resolution & detail: 600–1200 dpi balances quality and throughput. – White underbase: use on dark/non-porous substrates; calibrate white separately from color channels. – Infill & bleed: set appropriate ink density and bleed to maintain edge-to-edge color without oversaturation. – Drying & curing: coordinate drying/curing with print speed to avoid smudging or transfer errors; avoid over-/under-drying. |
| Quality control: inline & post-print QC | – Inline checks: visually inspect color consistency, registration, banding, and edge bleed. – Color verification: use a colorimeter/spectrophotometer against ICC targets. – Alignment checks: confirm designs align on the gang sheet to prevent mis-registration after separation. – Consistency across sheets: log color readings, head heights, and substrate batch numbers to detect drift. |
| Throughput optimization: layout & nesting | – Maximize density: nest as many designs as possible without compromising margins. – Design economy: favor simpler designs on busy sheets; reserve complex, high-color-density designs for dedicated runs. |
| Throughput optimization: batch processing & automation | – Batch scheduling: group similar designs/substrates to minimize tool changes and head calibration cycles. – Pre-set templates: reusable templates for common substrates. – Automated workflow steps: automate file prep, color management, and job ticketing to reduce manual intervention. |
| Throughput optimization: equipment & process optimization | – Throughput vs. quality: push for higher throughput while maintaining crisp edges/color accuracy; pause to diagnose if defect rates rise. – Uptime management: preventative maintenance on UV curing lamps, conveyors, and heaters. – Real-time monitoring: dashboards track sheets/hour, defect rate, and scrap rate; react to deviations quickly. |
| Curing & finishing: final stage | – UV curing considerations: calibrate cure times to achieve full cure without scorching; test substrate-specific exposure. – Lamp maintenance: monitor lamp intensity and aging to avoid under-cure. – Temperature control: keep consistent ambient/substrate temperatures during curing to avoid adhesion/color issues. |
| Post-transfer finishing | – Handling & storage: cool, dust-free area; handle transfers to avoid smudging or edge lifting. – Press settings for post-finish steps: ensure compatible temperatures/dwell times for coatings or seals. – Quality trailing: randomly sample finished products to catch drift and maintain QC benchmarks. |
| Workflow automation: integration & data flow | – Job tickets & traceability: centralized system to capture design data, substrate, color targets, and QA results for each gang sheet. – Color management integration: link color targets to RIP/printer for consistency. – Data-driven adjustments: feed QC/ curing results back to prepress/print settings for continuous improvement. |
| KPIs & continuous improvement | – Quality metrics: defect rate, color accuracy, and registration per gang sheet. – Throughput metrics: sheets/hour, time-to-ship, uptime vs downtime. – Continuous improvement: use PDCA/Kaizen to test, measure, and implement incremental improvements. |
| Troubleshooting common issues | – Color drift between sheets: recalibrate color targets; check substrate batch; verify RIP and head settings. – Mis-registration: re-check alignment marks, edge margins, and print head carriage alignment; validate nesting. – Banding/streaking: inspect nozzle health, cleaning routines, ink flow; slow print speed if needed. – Poor adhesion after transfer: review adhesive compatibility, curing time, and post-transfer pressing; run control fabric test. |
| Case examples & tips | – Case study 1: mid-volume shop increased throughput by 28% in a month via nesting, standardized templates, and automated QA logging; setup time reduced and color stabilized. – Case study 2: color drift when switching fabrics improved after formal color management with ICC targets, yielding better consistency across runs. |
Summary
Conclusion

